Example: SSO SAML with SCIM and Microsoft® Entra ID
This example depicts the configuration of SSO SAML and SCIM in combination with the user management system Microsoft® Entra ID.
Click
 Application launcher >
  Administration.
  Configuration is displayed.
Click User Management.
Click the arrow next to SCIM.
Click SCIM server.
Click
 Edit.
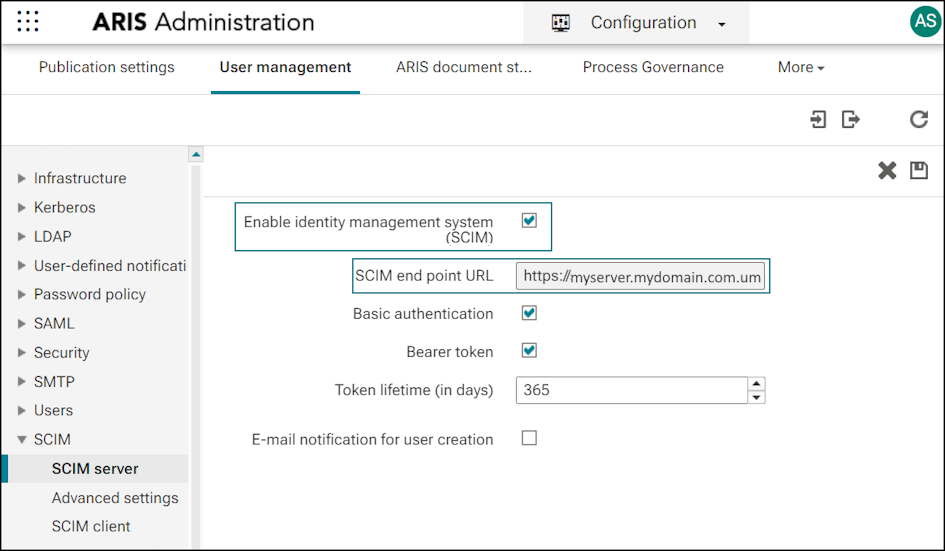
Edit.Select Enable Identity management system (SCIM).
Copy the SCIM endpoint URL value and hand over the SAML endpoint URL to your identity provider for provisioning.
Hand over the preconfigured value of the SCIM endpoint URL and provide it together with the bearer token to your IdP Administrator.
Optional: Enable/Disable the e-mail notification for user creation. That means that if a user is created on the SCIM server side, each newly created user receives an e-mail about the creation.
Click
 Save.
Save.Copy the endpoint URL and safe it in a text file.
Click
Application launcher > Administration.Click
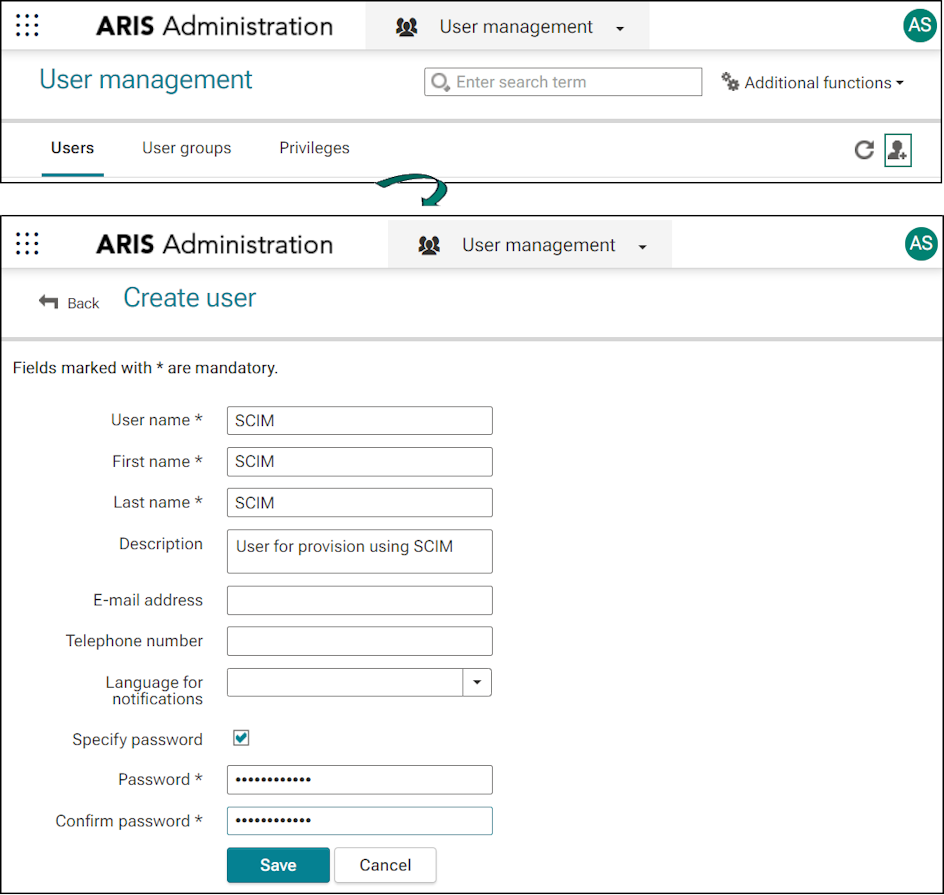
 User management. The list of users is displayed.
Click
 Add user. The Create user form opens.
Enter the user name, first and last name, e-mail address, if applicable, and password. If no password was specified for the user, a password is automatically generated for the first login and sent to the configured e-mail address. After the first login, the password must be changed.
Click Save. The Details view of the user is displayed.
Click
 Back.
Back.
Click
Application launcher > Administration.Click
User management. The list of users is displayed.Click the SCIM user.
Click Privileges. The list of function privileges is displayed.
Assign the Technical configuration administrator and the User administrator privileges.
Click
Edit assignment. The Associate users/user groups dialog opens.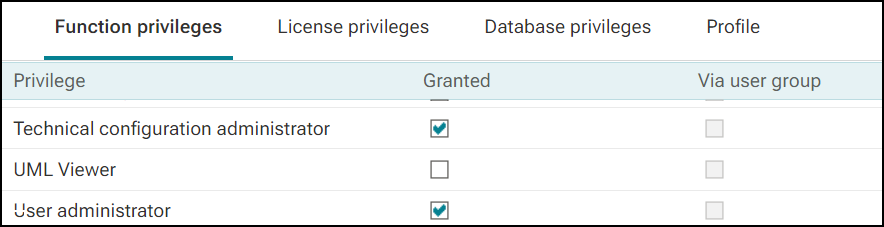
Log out.
Log in as user SCIM to ARIS.
Click
Application launcher > Administration.Click
User management. The list of users is displayed.Select the SCIM user.
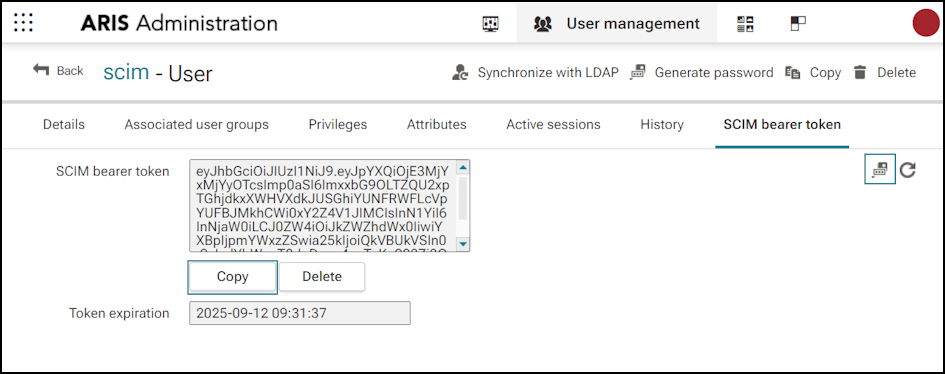
Click SCIM bearer token.
Click
 Generate bearer token.
Click Copy to copy the bearer token to the clipboard.
Open Microsoft ® Entra ID.
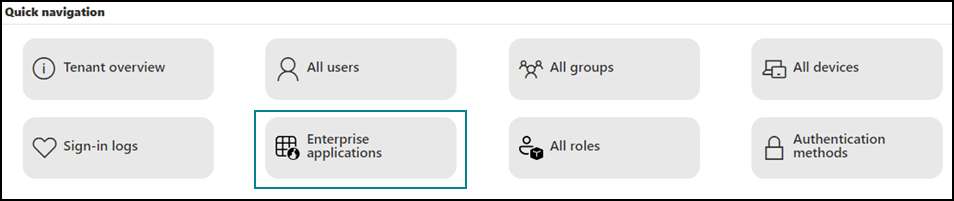
Click Enterprise applications.
Click
 New application.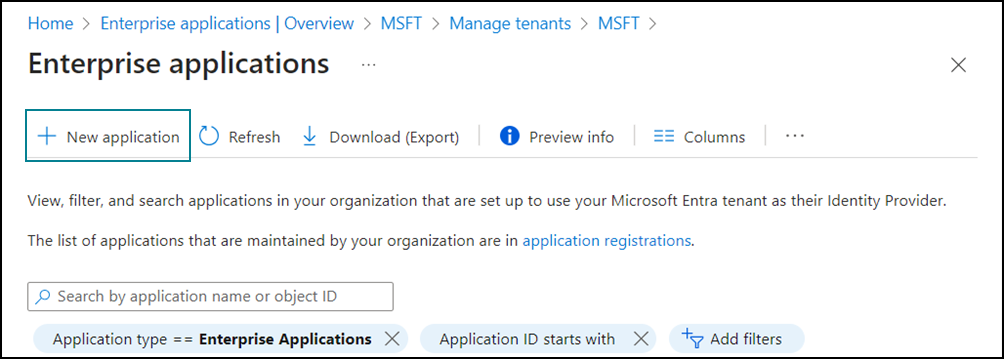
Click
Create your own application.
The Create your own application panel opens.
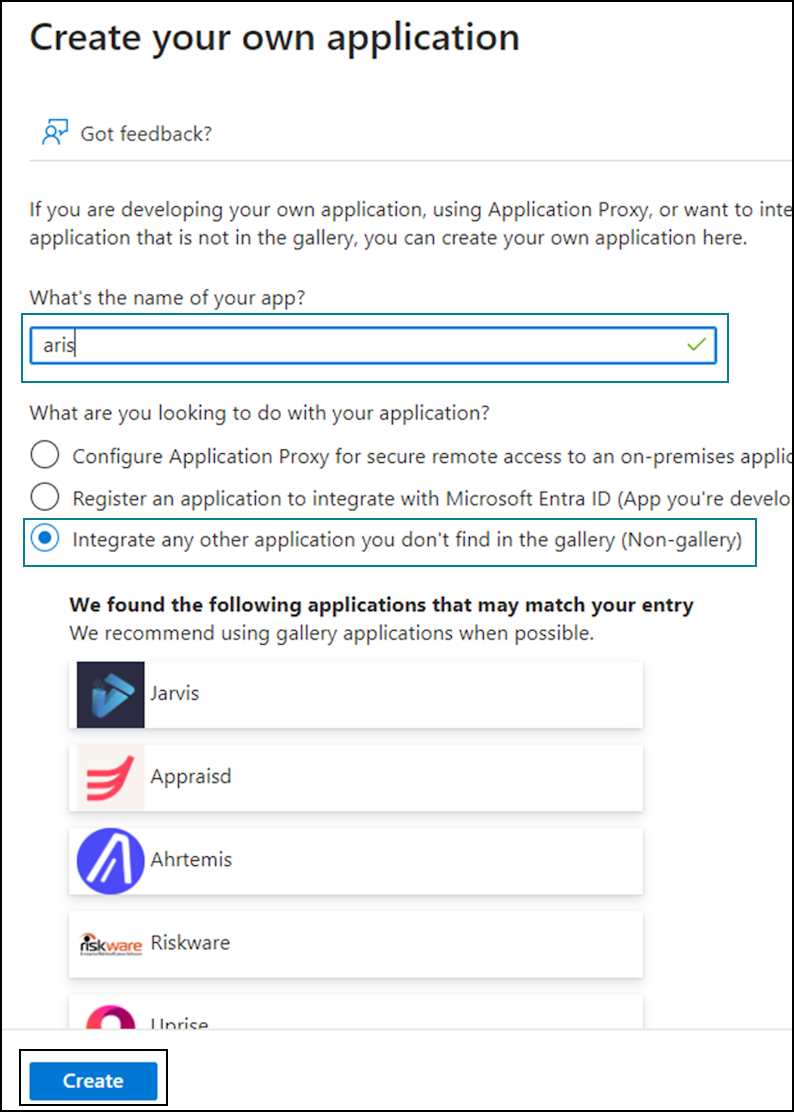
Enter the application name, for example, aris.
Enable the Integrate any other application you don't find in the gallery(Non-gallery) option.
Click Create. The Overview page of the application is displayed.
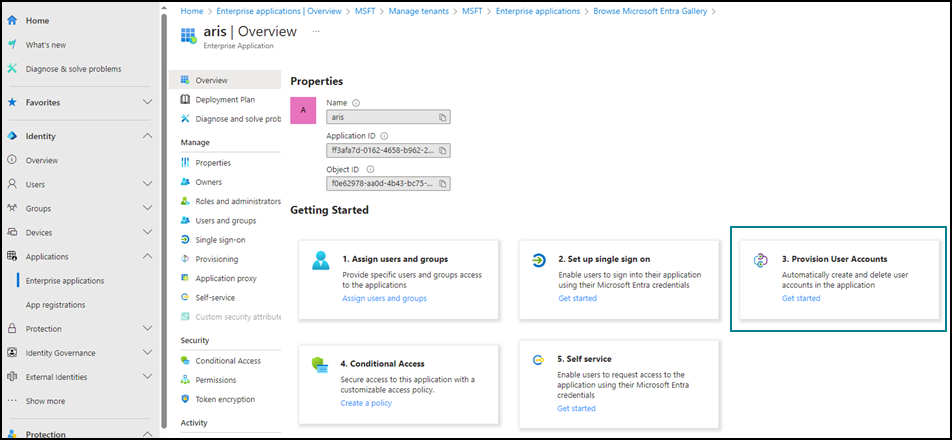
Click 3. Provision User Accounts. The Provisioning page is displayed.
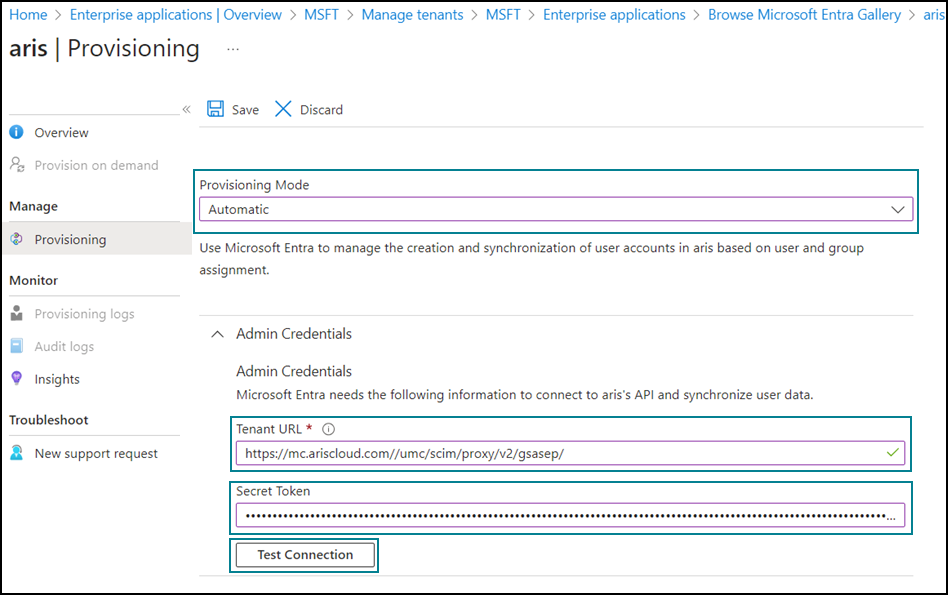
Change the provisioning mode to Automatic.
Paste the SCIM bearer token to the field Secret Token.
Paste the SCIM endpoint URL that was displayed in ARIS and that you saved in a text file in step one of this example to the Tenant URL field.
Click Test Connection. If the test is successful, you see the result as depicted below.
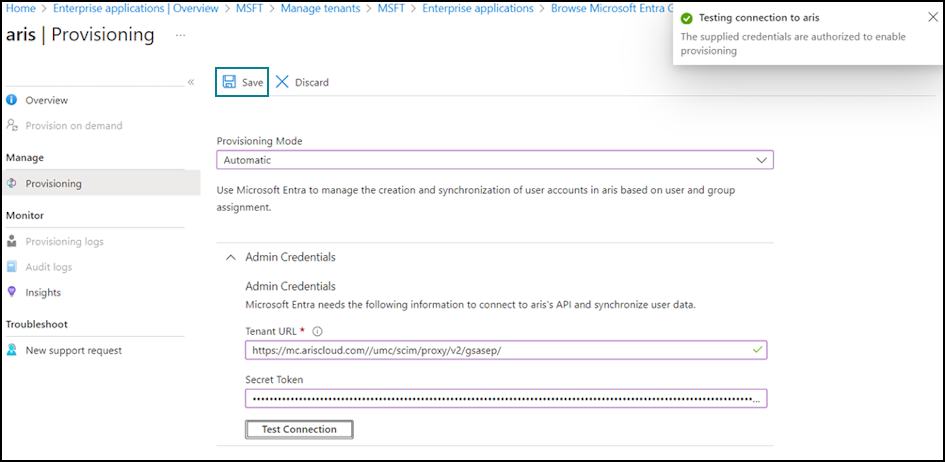
Click
Save.On the Overview page of the application, click Assign users and groups.
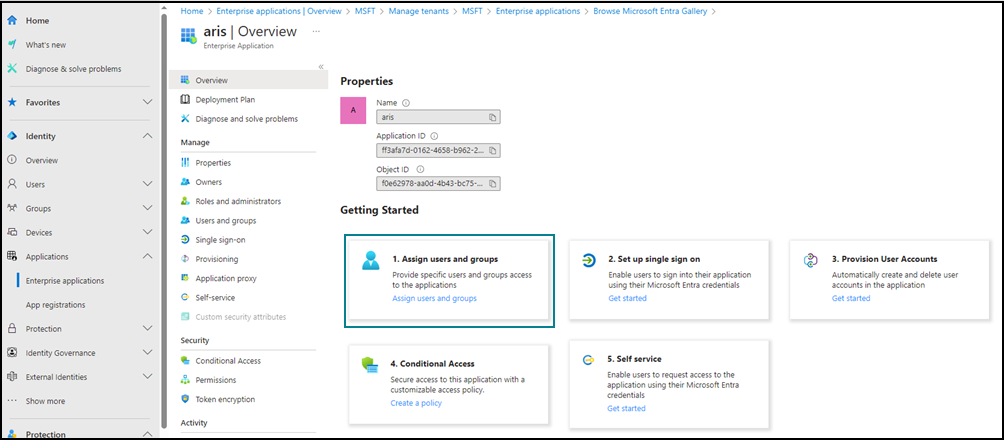
The Users and groups page of the application is displayed.
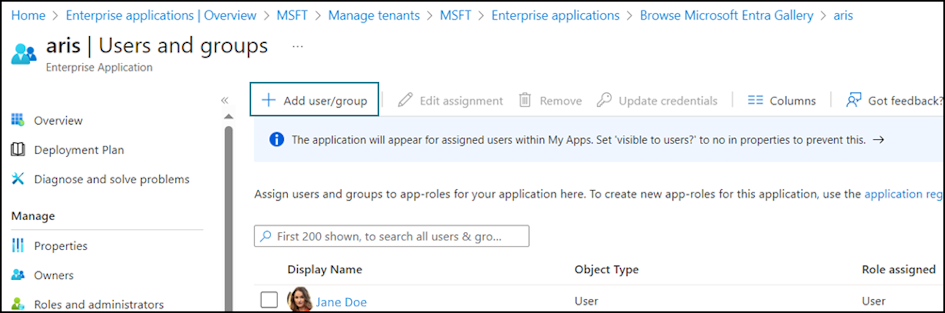
Click
Add user/group.
The users and groups are now successfully provisioned to ARIS.
On the Overview page of the application, click Set up single sign on.
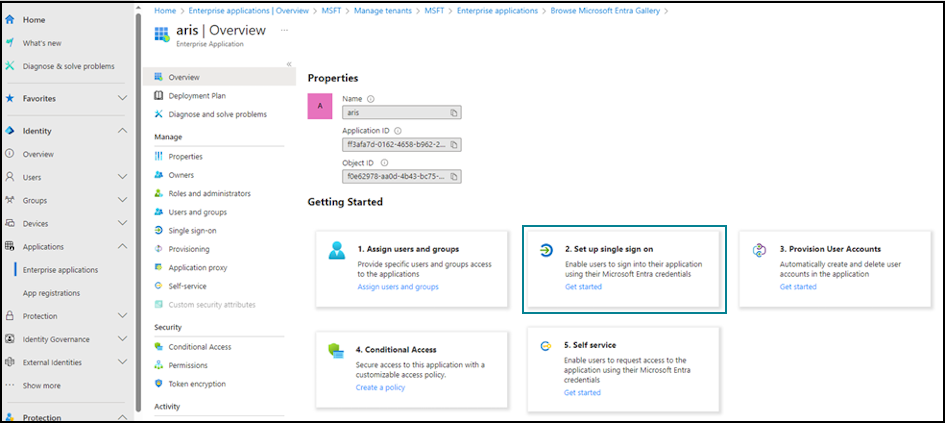
The Single sign-on page is displayed.
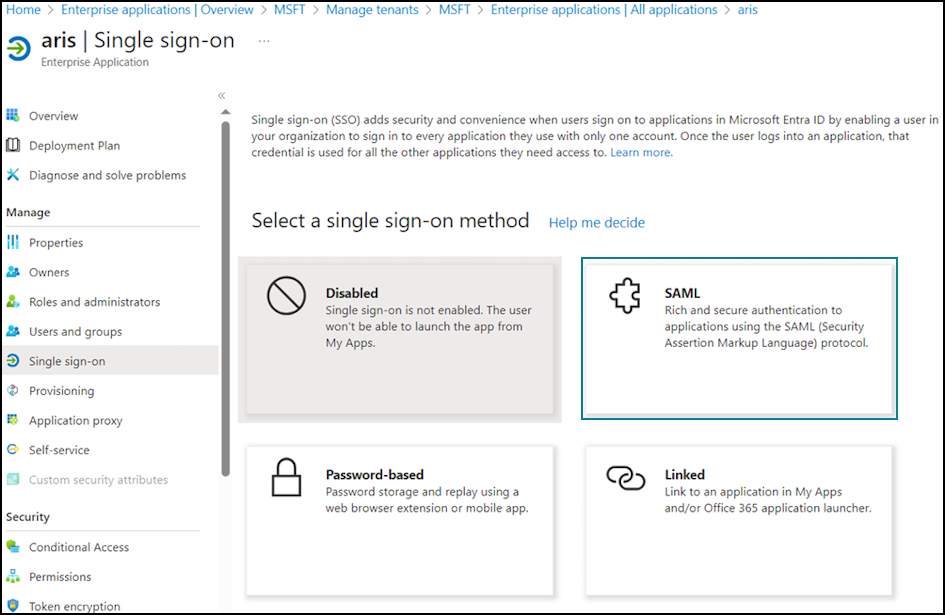
Click SAML. The SAML page opens.
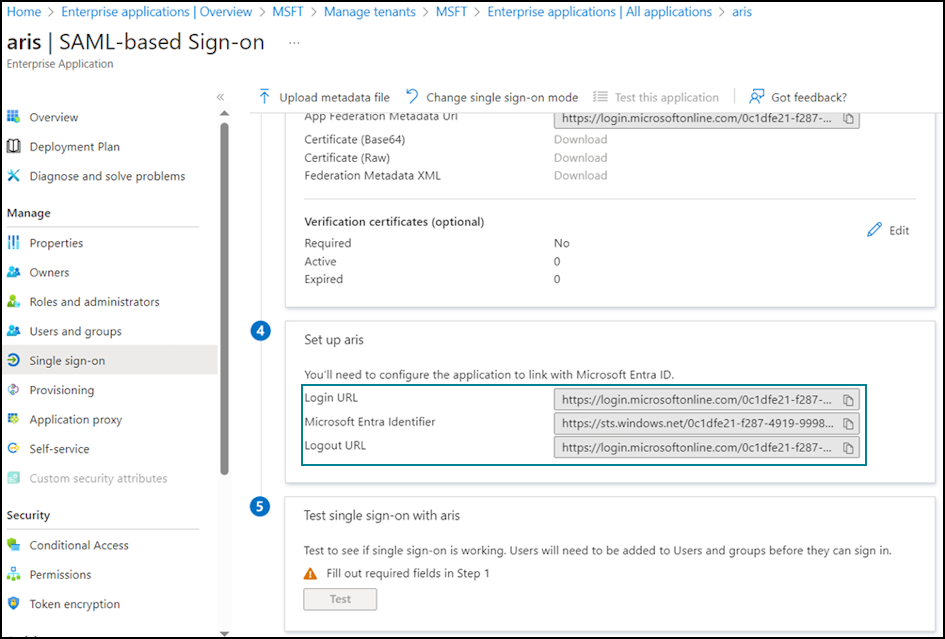
Open ARIS and log in with the SCIM user.
Click
Application launcher > Administration. Configuration is displayed.Click User Management.
Click the arrow next to SAML.
Click General.
Click
Edit.Enable Enable single sign-on.
Copy the Microsoft® Entra ID Identifier from Microsoft® Entra ID and paste it to the Identity provider ID field in ARIS.
Copy the Login URL from Microsoft® Entra ID and paste it to the Single sign-on URL field in ARIS.
Copy the Logout URL from Microsoft® Entra ID and paste it to the Single logout URL field in ARIS.
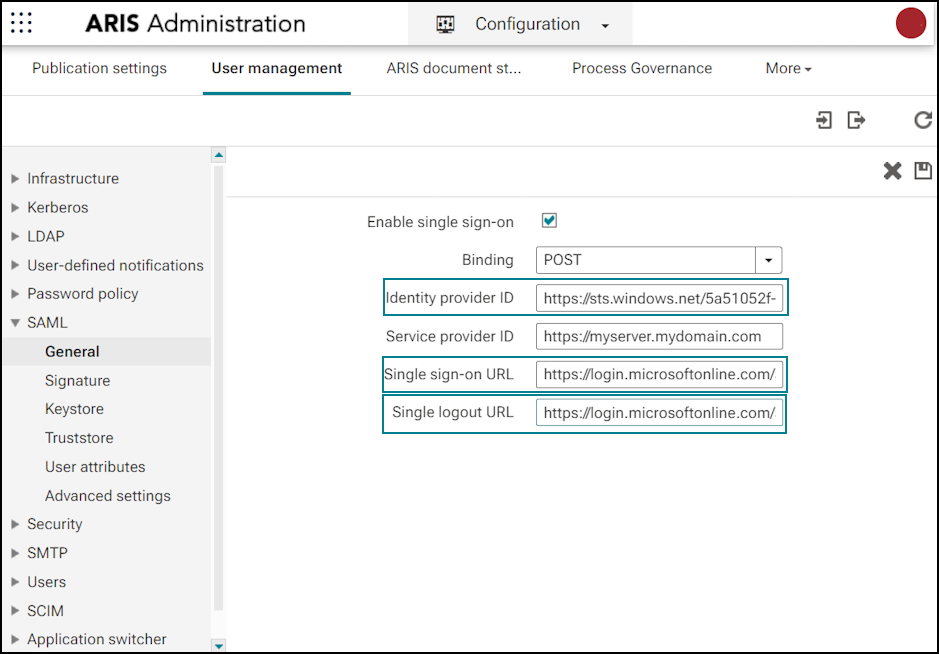
Click
Save.
If SAML is enabled, enter the following in your browser address bar:
https://myserver.mydomain/umc/rest/saml/metadata.xml?tenant=default.
The metadata is displayed.
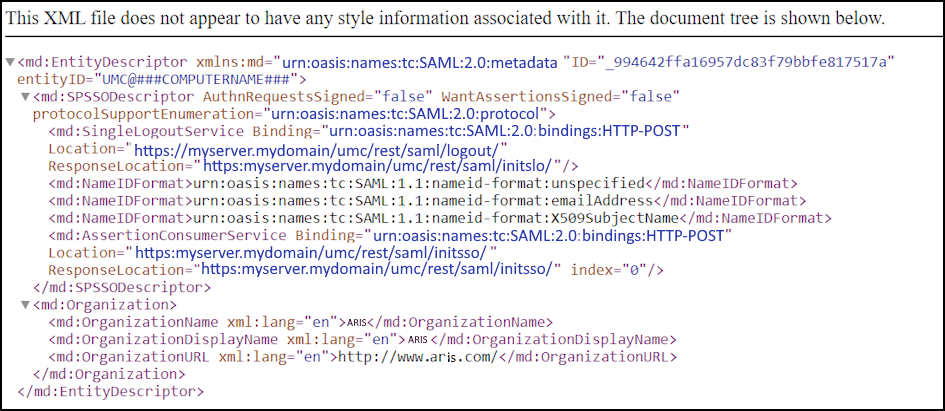
Copy the metadata content to a text file and save it as XML file.
You have saved the SAML metadata as an XML file.
On the Overview page of the application, click Set up single sign on.
The Single sign-on page is displayed.
Click SAML. The SAML page opens.
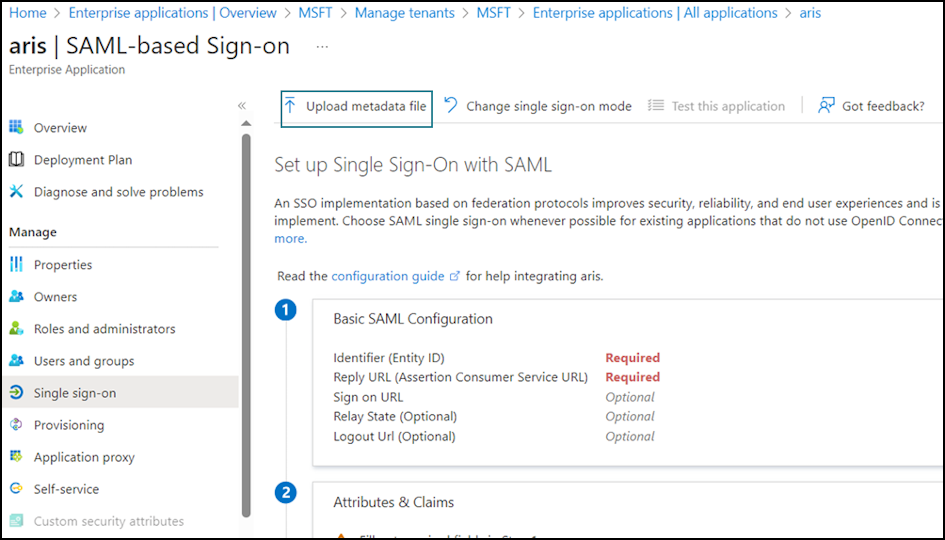
Click
 Upload metadata file. The Basic SAML Configuration page opens.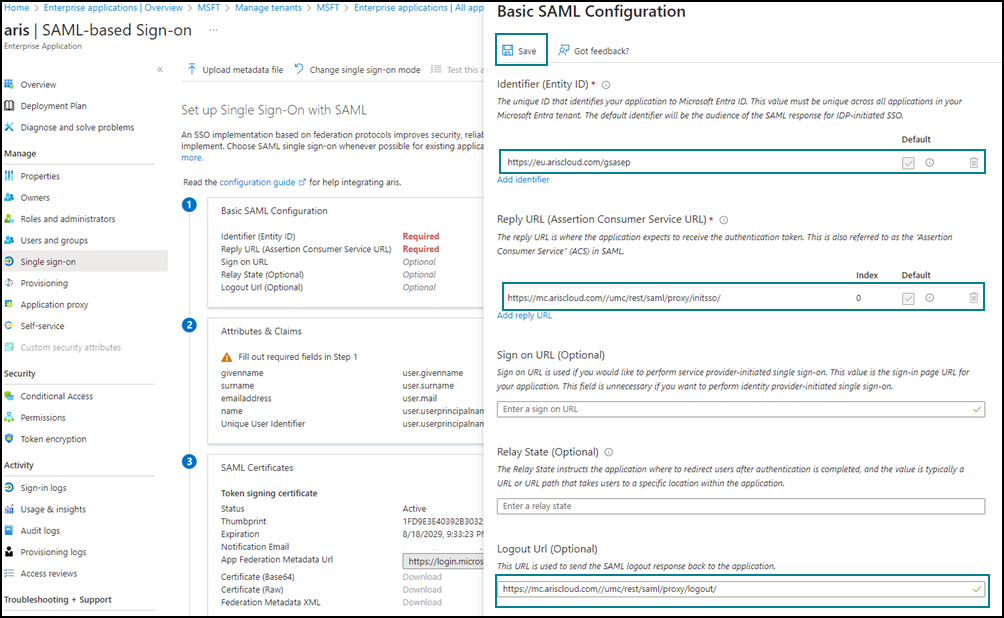
Click
Save.
Open ARIS and log in with the SCIM user.
Click
Application launcher > Administration. Configuration is displayed.Click User Management.
Click the arrow next to SAML.
Click Advanced settings.
Click
Edit.Change the Authentication context comparison settings to exact.
Disable all authentication context classes.
Optional: Enable Automatically create user.
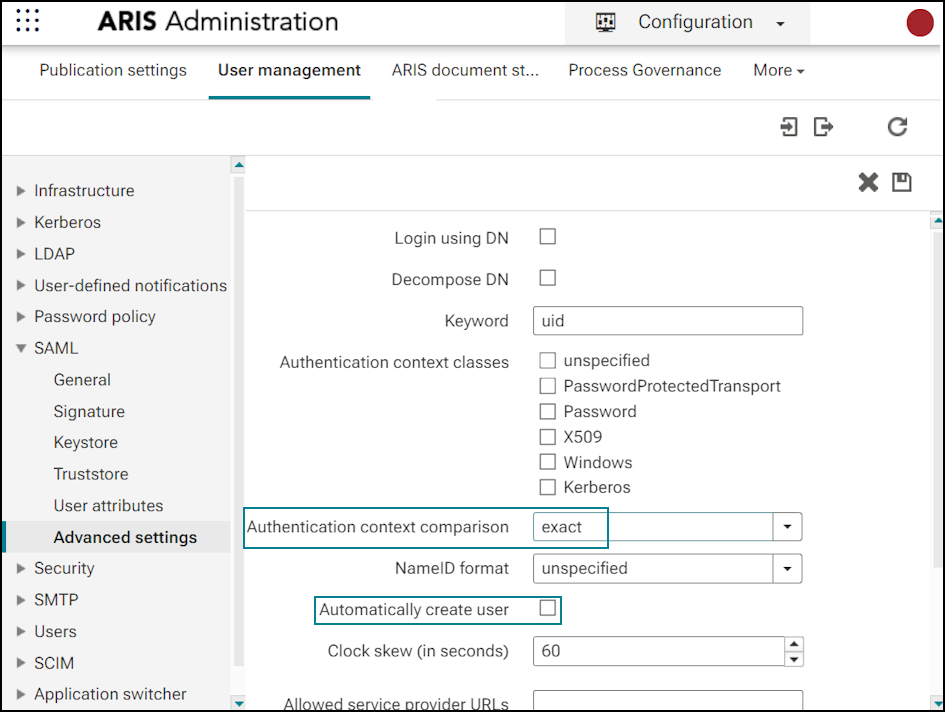
SSO is set up in ARIS.
SAML truststore
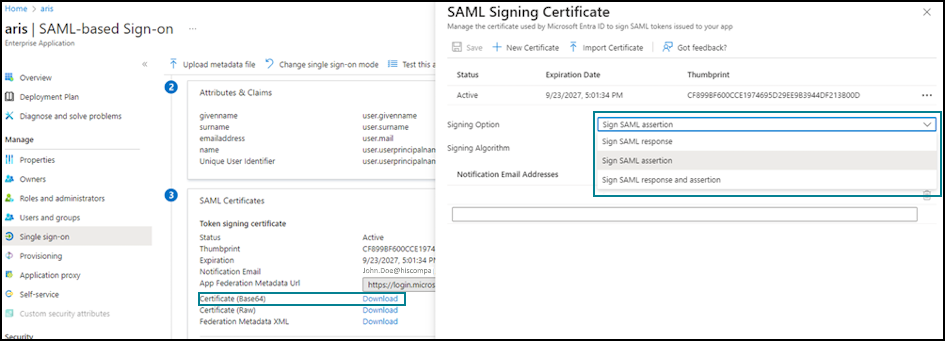
Configure which signing options are requested on Microsoft® Entra ID side and download the certificate.
Download the certificate from Microsoft® Entra ID.
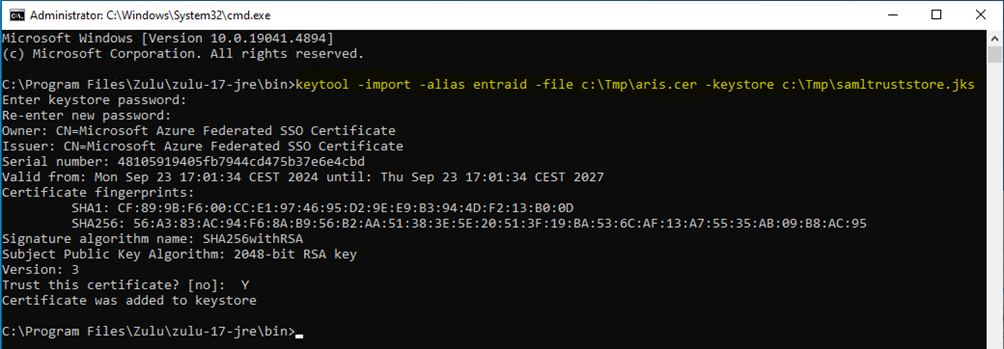
Create the java truststore file with a Java command:
keytool –import –alias entraid –file aris.cer –keystore samltruststore.jks
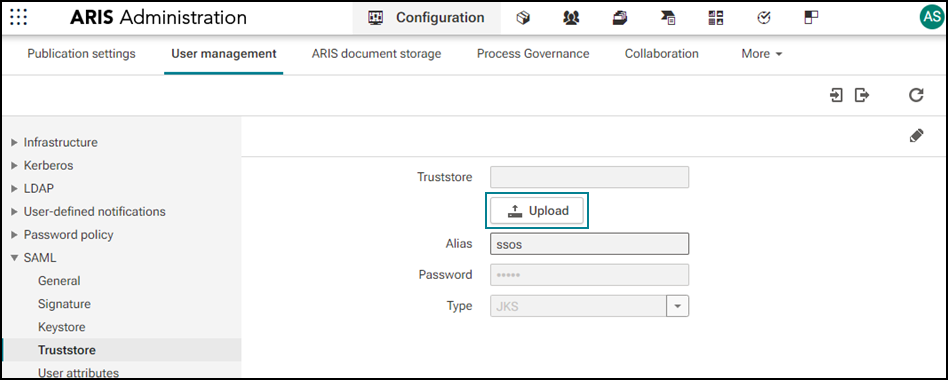
Upload the Java truststore file to ARIS.
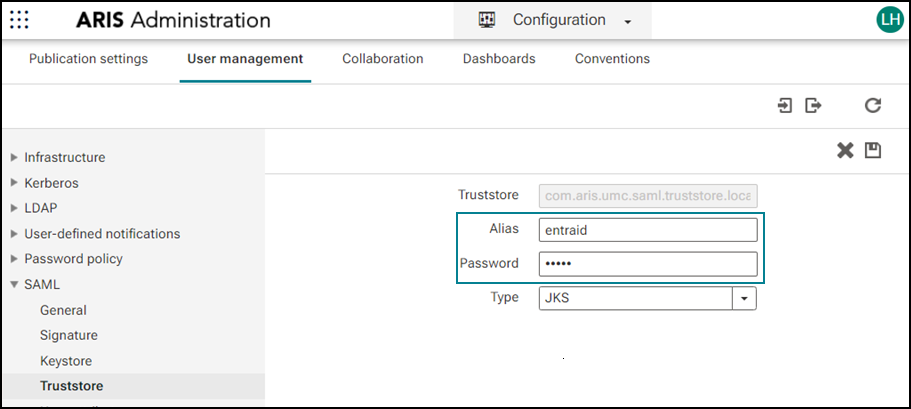
Edit the page and enter Alias and Password with the values you used in step 3.
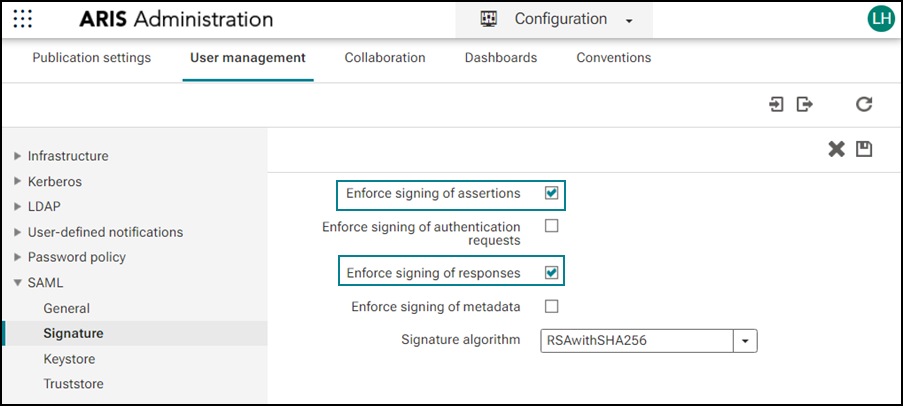
Enable the signing – depending on the configuration in Microsoft® Entra ID (see signing option in step 2). Enable signatures in ARIS.
Optional: SAML keystore
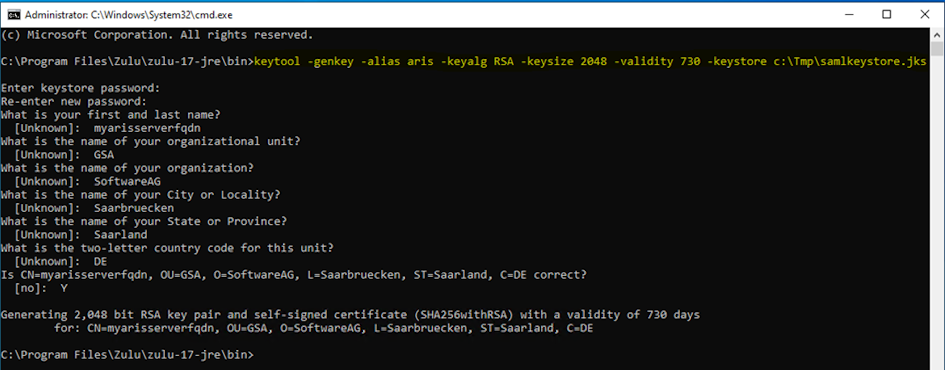
Create the Java keystore file with a Java command:
keytool -genkey -alias aris -keyalg RSA -keysize 2048 -validity 730 -keystore samlkeystore.jks
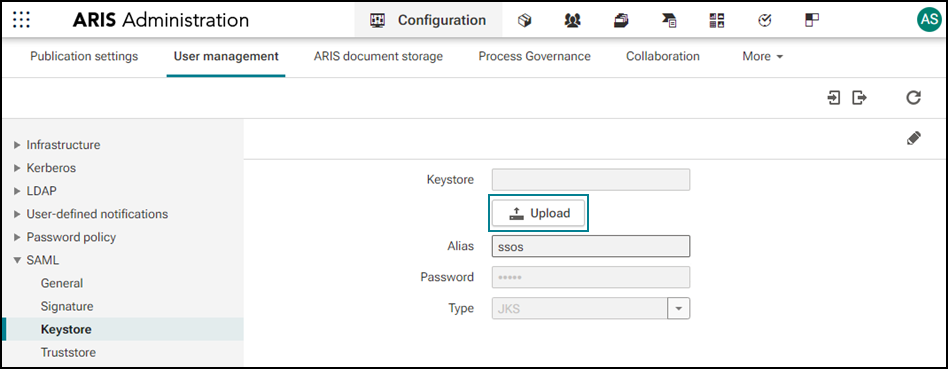
Upload the Java keystore file to ARIS.
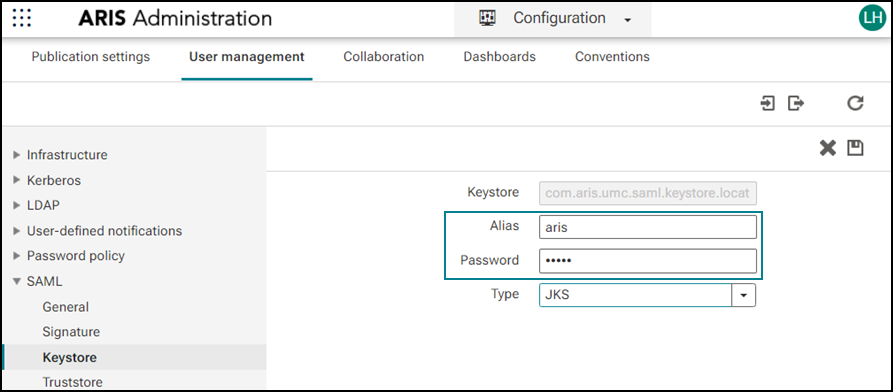
Edit the page and enter Alias and Password with the values from step 3.
Enable the signing Enforce signing of authentication requests.
Save again the service provider metadata content (see 7: Save the metadata content as an XML file) and upload it to Microsoft® Entra ID (see 8: Upload metadata to Microsoft® Entra ID, step 3).
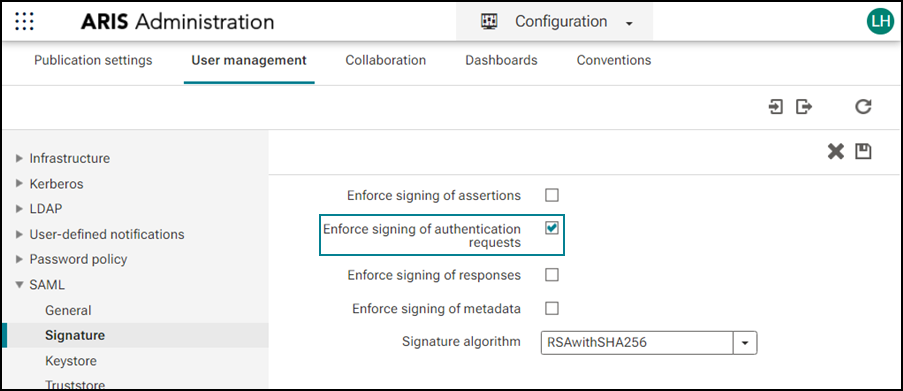
You have specified the SAML signatures.
Copy the claim name from Microsoft® Entra ID.
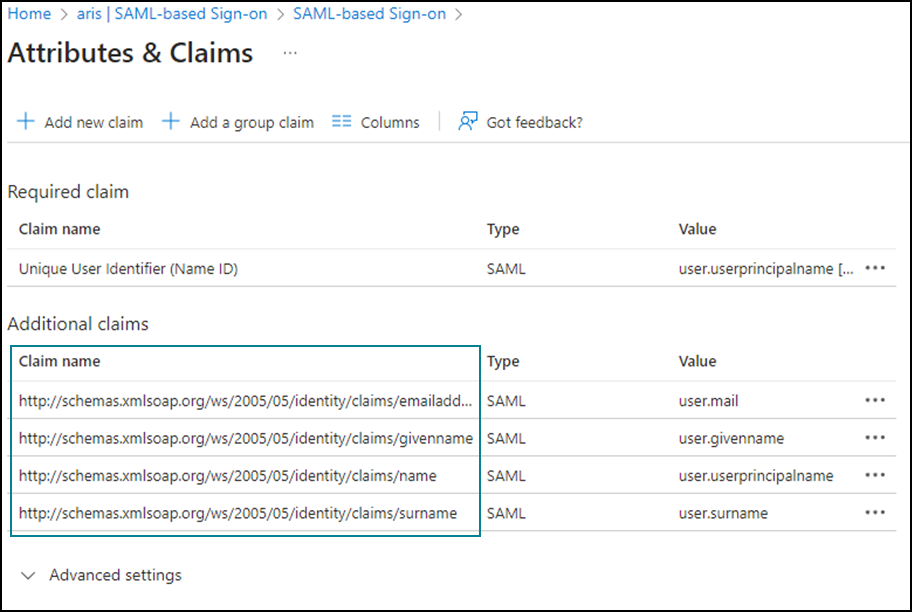
Paste the claim name to ARIS configuration.
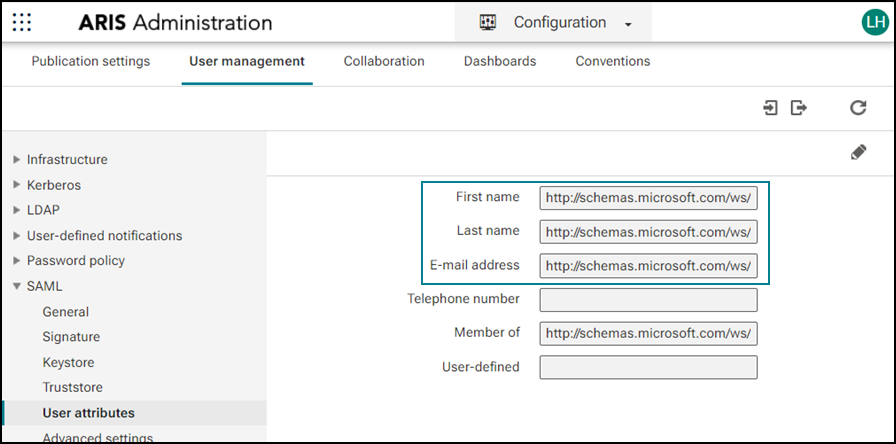
You have configured the SAML user attributes.